In this lesson you will learn about the tools you will leverage in your classes.
- Focus on the tools used for each class format and the equipment safety guidelines and considerations.
- Think about how members benefit from your knowledge and the cues you provide to modulate the work effort.
- Complete the table on this lesson in the unit study guide.
Many SilverSneakers classes utilize equipment to optimize training benefits and provide additional support and stability. Among the most common tools are hand-held weights, elastic tubing with handles, a soft “play” ball, and a steel gauge chair. Instructors must understand recommendations for set-up, storage and movement execution for each tool to ensure a safe and effective group exercise experience.
How will you leverage each of these tools to meet the member at their level of fitness needs?
What can you do to help build their confidence to increase their intensity of work?
Chair
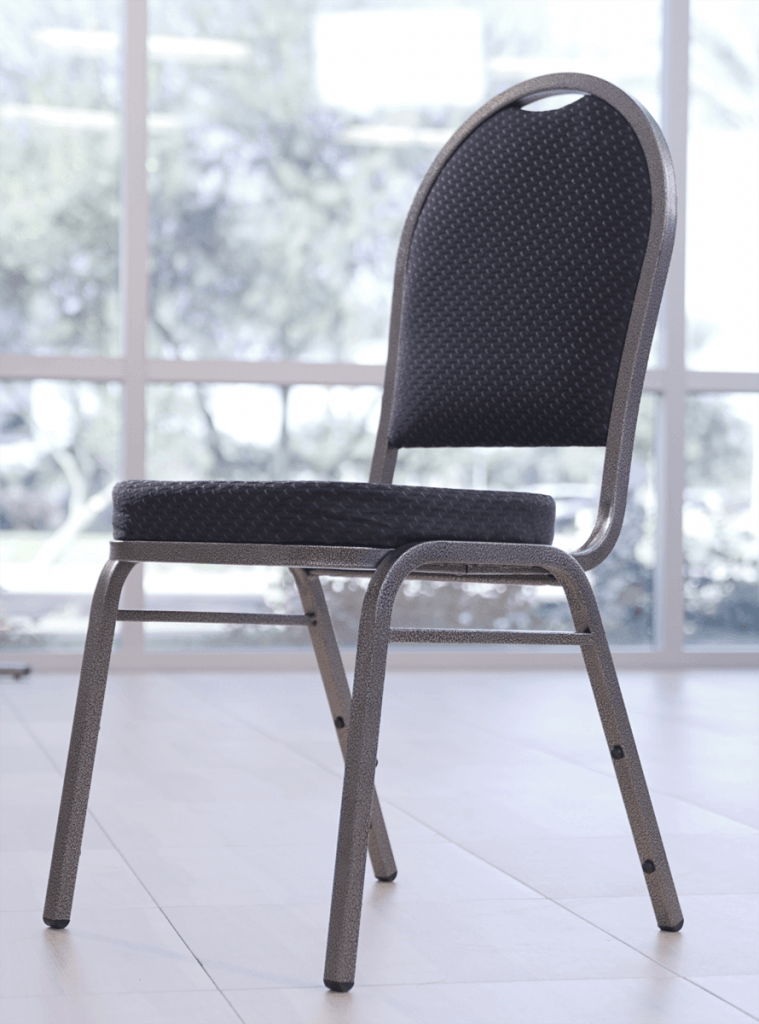
A chair is used in the Classic, Circuit, Stability and Yoga classes for support, stretching and relaxation, and may be utilized in SilverSneakers FLEX locations. A straight-back, armless steel gauge chair with an uncontoured seat to ensure proper posture and stability is recommended. A chair must be available for every class participant. Correct seated posture is forward in the chair without back support, chest up and eyes forward. Folding chairs are not acceptable and elevate the level of risk while performing static and dynamic choreography with or without resistance tools.
Instructor Tips for Using Chairs
- To minimize back pain and mitigate a drop in blood pressure, it is recommended that equipment is stored underneath a chair or out of harm’s way.
- Equipment is stored underneath the chair in Classic. It is recommended that instructors cue: and demonstrate “step to the side and lean to the side” while reaching under the chair. This technique is accomplished by placing one foot to the side with the opposite hand on the thigh for support while reaching to the outside of the leg.
- If participants are unable to reach under the chair, a second chair may be placed alongside the primary chair for equipment storage.
- Equipment is stored on top of the chair in Circuit to limit the need to reach down to the floor.
- When storing chairs, stack them safely and avoid stacking so high as to create an unsafe environment. If chairs must be stacked high for storage, please provide a staff member to un-stack chairs for class members during room set-up. If using chair dollies, do not stack chairs higher than you can reach or heavier than you can push.
- When transitioning to a position behind the chair for standing choreography, ask participants to walk around to the back of the chair rather than move the chair and expose items on the floor.
- SilverSneakers classes ARE NOT seated exercises classes. In Classic, exercises can be performed from a seated and/or standing position. Instructors should design classes to “keep moving,” and should design and teach classes in a continuous manner to improve cardiovascular and muscular endurance.
Elastic Tubing with Handles
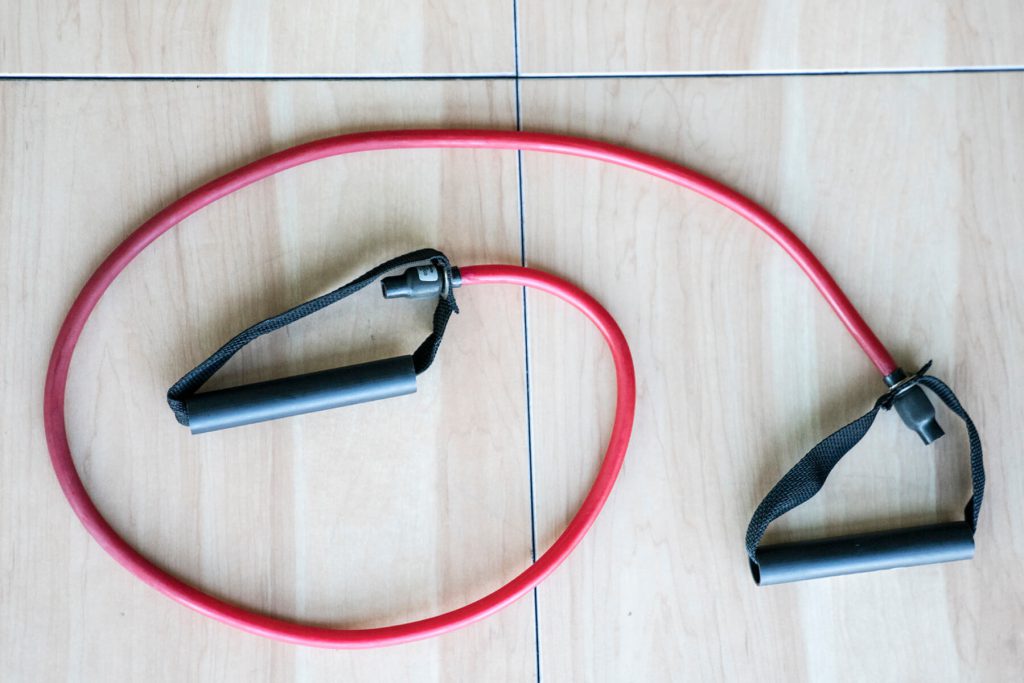
Variable resistance options offer participants the opportunity to individualize their workout by increasing or decreasing the intensity level of the strength segment without increasing the risk. The resistance of the elastic tubing can be altered by using a shorter tube or segment of the tube, when performing work. Since the tubing is variable and not gravity dependant, it is an ideal tool for strengthening the chest, abdominals, and back when floor work is not permitted. Elastic tubing with handles is different than exercising with a “band.”
Selecting the proper elastic tubing with handles: When holding the elastic tubing with both hands at shoulder-width distance and the tube at shoulder height, if the tubing can be stretched 2½ times beyond its original length, it is too light, and a heavier resistance should be recommended.
Color-coded elastic tubing with handles increases in resistance from yellow to blue. Indicated resistance weight reflects tubing stretched to 1½ times its length.
Color
Weight
Suggested Audience & Tips
Yellow
3-5 lbs
Least resistance, appropriate for beginners or those with injury
Green
6 lbs
Appropriate for beginners and moderately fit members
Red
10 lbs
Appropriate for stronger members
Blue
15 lbs
Appropriate for highly fit members
Instructor Tips for Elastic Tubing with Handles:
- For the upper body, participants must not adjust the length of the elastic tubing with handles by wrapping it around the wrist or hand. If the tubing is too long, cue participants to “grasp along the tube with a neutral wrist.”
- For the lower body, cue participants to place the elastic tubing with handles under their feet with their toes down to keep the tubing from rolling out from under their feet.
- The use of elastic bands or tubing without handles is not recommended.
- When securing the tubing through the hole at the top of the back of the chair for abdominal work, cue participants to sit back in the chair to avoid having the rear legs of the chair lift off the floor.
- Tubing without handles is not recommended.
Weights

Hand-held weights are gravity resistant, and the combination of weight selection, lever use, and speed can increase or decrease the effectiveness of muscle-specific strength improvements. Since weights are gravity resisted, recognize the importance of body position when selecting exercises. Often, the shoulder will become the primary mover for upper-body resistance exercise. Avoid overuse.
Selecting the proper hand-held weights: Look for appropriate muscle contraction throughout a full range of movement without a wrist break (too heavy), failing to return to the start position (too heavy), or evidence of an exercise being performed without any discernible muscle contraction (too light).
Instructor Tips with Hand-Held Weights:
- Participants may use a different weight resistance in each hand to aid in caring for joints with injury, strength deficit, or mobility limitations.
- The use of wrist or ankle weights is not recommended.
The SilverSneakers Ball
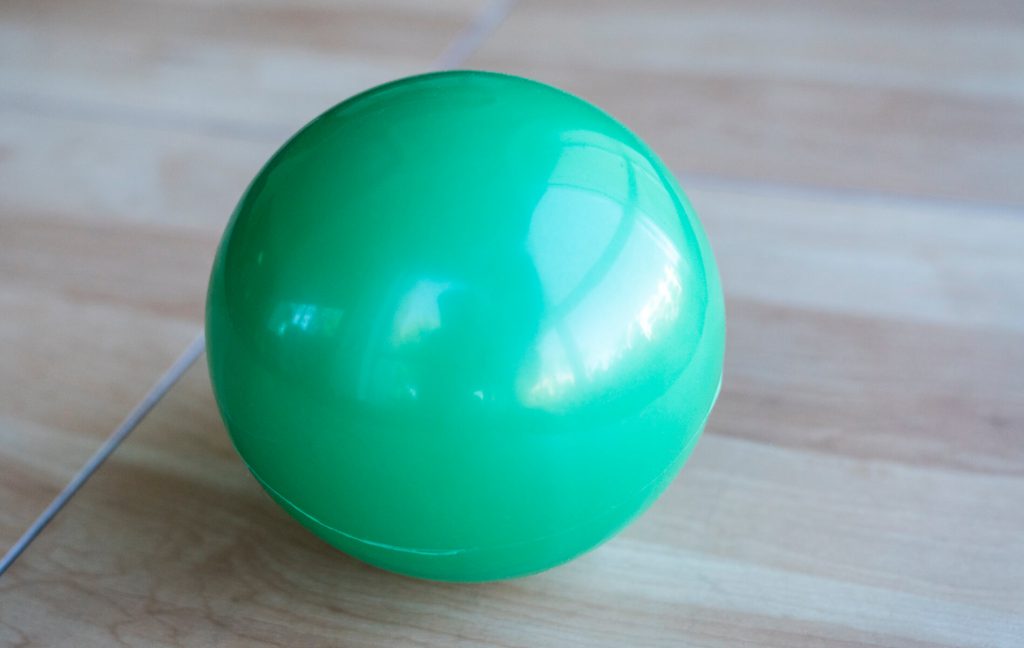
A six- to nine-inch SilverSneakers ball that is semi-soft is often used to increase the strength and range of movement of the smaller muscles of the body. However, the ball’s diversity for fun and hand-eye coordination activities and the ability to use this tool for exercise modifications increases its versatility for participants with disease and/or disability challenges.
The SilverSneakers ball is inflatable and can be filled with air to varying sizes (six to nine inches in diameter). This option can offer a softer/harder surface for small or large hands as well as accommodate hand and finger grasping strengths.
Instructor Tips for the SilverSneakers Ball:
- Maintain a neutral wrist when pressing the ball with both hands. Cue for elbows to be close to the body rather than out to the side, and avoid forced hyperextension of the wrist.
- Cue for the ball to be placed “between the legs” rather than “between the knees” for inner-thigh presses.
- Avoid walking in any direction with the ball placed between the legs.
- Avoid doing exercises while seated on a large fitness stability ball. Choreography with a large stability ball might include range of movement programming while seated in a chair, standing reaction or agility exercises such as partner bounce drills or dribbling/rolling the ball.
Congratulations!
You’ve completed Unit 3. Now you’re ready to check your understanding of the content by completing the Unit 3 Review Quiz.
Good luck!